Table of Contents

Server-Side Request Forgery (SSRF) vulnerabilities allow attackers to send requests on behalf of the vulnerable web application. Much like a proxy, if you trigger an SSRF vulnerability and request https://www.ipecho.net/plain, you would see the application server’s source IP address rather than your own. In many cases, this vulnerability can be leveraged to access internal resources that the back-end server can communicate with.
Applications hosted in AWS pose a heightened risk when SSRF is present, as the instance metadata can be accessed, and in some cases, contains privileged API keys. SSRF vulnerabilities can lead to a full AWS account take-over and have been the case on several of CyberMaxx’s recent penetration tests including “serverless” application deployments.
This blog post describes step-by-step how to use Netflix’s lightweight aws-metadata-proxy to protect AWS metadata even when SSRF vulnerabilities are present. We will demonstrate the effectiveness of aws-metadata-proxy using a real SSRF zero-day CyberMaxx recently discovered.
Overview
CyberMaxx discovered that Hawtio <= 4.6.8 contains a proxy servlet that makes a request to any server appended onto the /proxy/ object. Our Hawtio advisory can be found here.
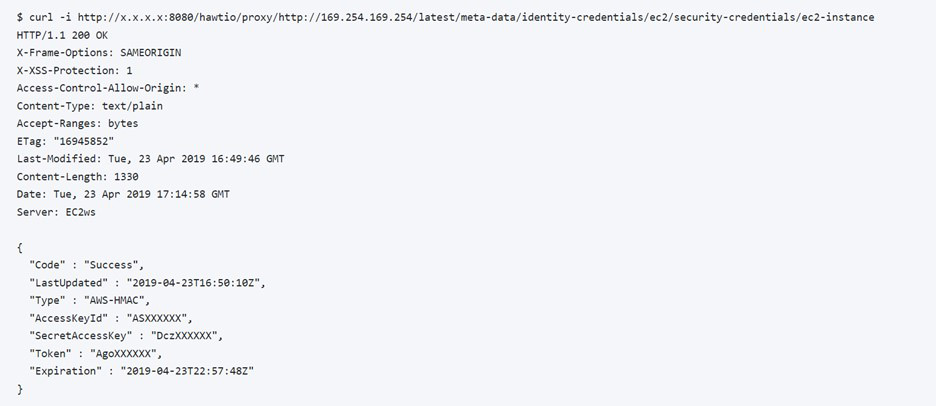
By accessing http://hawtio-server/proxy/http://169.254.169.254/latest/meta-data/identity-credentials, it was possible to pull the EC2 IAM instance API tokens. The API tokens were then configured in the AWS CLI and used to enumerate IAM permissions. IAM policies are tedious to write, and in many cases are overly permissive allowing access to arbitrary resources in AWS.
The lab environment is quite simple for this demonstration. There is an EC2 instance hosting a vulnerable version of Hawtio. This first part of the post will briefly show some of what an attacker can achieve through SSRF in a cloud environment. Following this we will install aws-metadata-proxy which will prevent the SSRF 0day.
Stealing AWS Keys Through SSRF
Accessing the metadata service is a goal when attacking applications hosted in AWS as it can turn a text-book web application vulnerability into an AWS account compromise.
The example below demonstrates obtaining the AWS keys through the Hawtio SSRF zero-day.
To make use of the AWS access key returned above, we populate the AWS CLI credentials file as shown below.

The AWS CLI will use this credentials file to authenticate with AWS. With this setup, we can enumerate the IAM permissions and, in turn, the AWS account and resources it contains.

Depending on specific IAM permissions, an attacker could very well have the keys to the AWS kingdom at this point, or at least have an opportunity to escalate IAM privileges.
Installing Netflix’s AWS-METADATA-PROXY
aws-metadata-proxy is a clever program developed by Netflix-Skunkworks. iptables is used to block all connections to the AWS metadata IP (169.254.169.254) unless they originate from a designated user which owns the aws-metadata-proxy process. All other requests to the metadata service are delivered to the aws-metadata-proxy service. aws-metadata-proxy checks the requests’ UserAgent which an attacker wouldn’t typically have control over in an SSRF scenario. Generally, this prevents IAM credential access even through zero-day SSRF vulnerabilities like Hawtio. The commands below were run on an Ubuntu instance in our demo environment, but aws-metadata-proxy will work on other distributions as well.
GOLANG Prerequisites

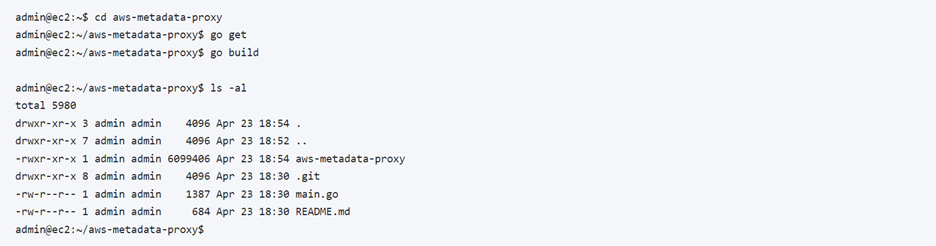
With golang installed and configured correctly, we can simply clone the aws-metadata-proxy repo.
![]()
Now Build The Go Application
With the binary built (listed above as aws-metadata-proxy), it can be moved anywhere convenient such as /usr/local/bin.
Before applying the iptables rule, a local user account was created, awsproxy, for the purpose of running the aws-metadata-proxy binary.
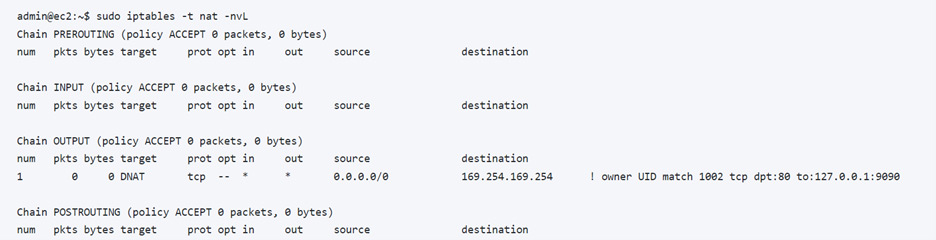
After the user account is created, we can simply add the following iptables rule. Be sure to change the uuid-owner to the user used to run the aws-metadata-proxy binary – in our case it’s awsproxy.
![]()
The command shown below can be used to verify the NAT rule was properly added.
Now it’s time to run the aws-metadata-proxy app from the awsproxy account.

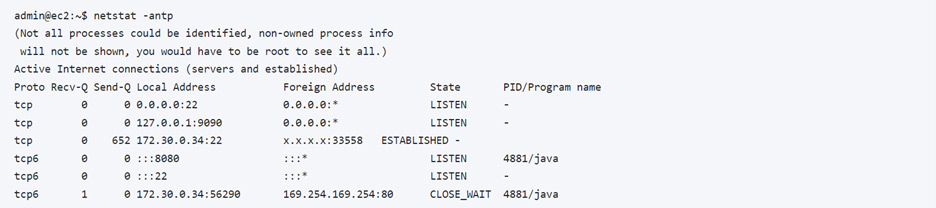
aws-metadata-proxy should now show listening on 127.0.0.1:9090.
aws-metadata-proxy is up and running. Time to test the Hawtio SSRF zero-day.
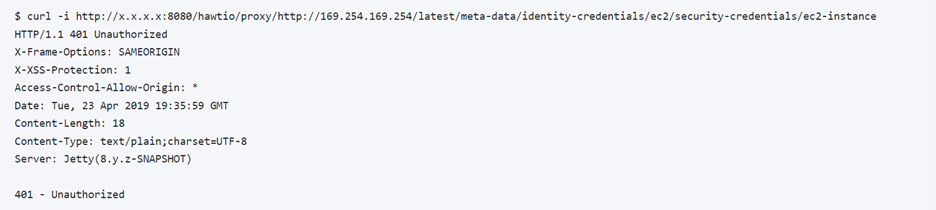
Success! The Hawtio SSRF can no longer be used to access the AWS metadata service, as indicated by the “401 – Unauthorized” response.
Conclusion
Netflix’s open-source aws-metadata-proxy provides free, simple, and lightweight metadata protection from SSRF exploitation. SSRF is still a problem for other internal resources and needs to be patched, but aws-metadata-proxy helps protect AWS metadata service in the meantime.


